Welcome To Our Blog!
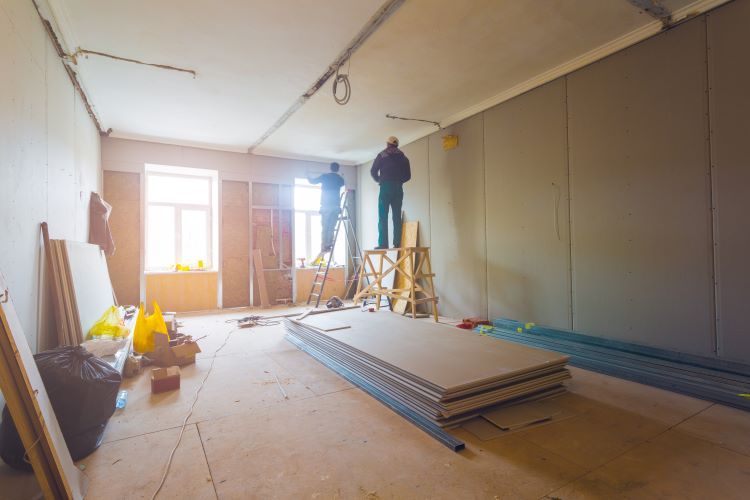
When it comes to building or renovating a home, choosing the right drywall is a critical decision. For homeowners and contractors in Saskatoon, solid gypsum sheets stand out as the ultimate choice for superior drywall. Renowned for their durability, versatility, and aesthetic appeal, solid gypsum sheets provide a reliable solution for creating smooth, long-lasting walls and ceilings. Here’s why they’re a cut above the rest. What Are Solid Gypsum Sheets? Solid gypsum sheets, commonly referred to as drywall or plasterboard, are panels made primarily from gypsum – a natural mineral known for its fire resistance and strength. These sheets are sandwiched between layers of durable paper, creating a lightweight yet robust material perfect for interior wall and ceiling construction. Benefits of Solid Gypsum Sheets 1. Exceptional Durability Solid gypsum sheets are engineered to withstand the wear and tear of daily life. Whether it’s in high-traffic areas or busy family homes, these sheets resist dents, scratches, and impacts better than many other options. 2. Fire Resistance One of gypsum’s most remarkable properties is its fire resistance. Solid gypsum sheets act as a barrier, slowing the spread of fire and providing critical time for occupants to evacuate. This makes them an excellent choice for enhancing home safety in Saskatoon’s residential and commercial properties. 3. Smooth Finish for Aesthetic Appeal When installed and finished correctly, gypsum sheets create an impeccably smooth surface, perfect for painting or wallpapering. This ensures your walls and ceilings look polished and professional. 4. Sound Insulation Solid gypsum sheets are an effective choice for soundproofing. Whether you want to block noise between rooms or reduce echoes in a shared space, gypsum sheets can help create a quieter, more comfortable environment. 5. Mold and Moisture Resistance Specially treated gypsum sheets are available with mold and moisture-resistant properties. These are ideal for humid areas such as bathrooms, basements, and kitchens, helping to prevent costly repairs caused by water damage. Applications of Solid Gypsum Sheets Residential Projects From living rooms to bedrooms, solid gypsum sheets are perfect for creating smooth, durable walls and ceilings in homes across Saskatoon. Commercial Spaces Gypsum sheets are widely used in offices, retail stores, and restaurants for their clean finish and ability to meet fire safety standards. Renovation Projects Updating your walls? Solid gypsum sheets make it easy to modernize your space while maintaining structural integrity. Why Choose Saskatoon Drywallers for Your Gypsum Needs? At Saskatoon Drywallers , we understand that quality materials and expert installation are essential for superior results. Here’s why clients trust us for their drywall projects: Premium Materials : We source only the highest-quality solid gypsum sheets to ensure lasting performance. Professional Installation : Our skilled team ensures precise installation, delivering smooth, flawless walls every time. Customized Solutions : We tailor our services to meet the specific needs of your project, from moisture-resistant sheets to specialized fire-rated panels. Local Expertise : With years of experience serving Saskatoon, we understand the unique demands of local homes and businesses. Tips for Maintaining Solid Gypsum Drywall Inspect Regularly : Check for cracks, dents, or moisture damage and address issues promptly to maintain integrity. Repaint Periodically : Refreshing the paint can help protect the surface and keep your walls looking their best. Control Humidity : Use dehumidifiers in moisture-prone areas to prevent mold growth. Conclusion Solid gypsum sheets offer an unbeatable combination of durability, safety, and style, making them the ultimate choice for drywall in Saskatoon. Whether you’re building a new home, renovating a space, or upgrading your business, these versatile panels deliver exceptional results. Ready to experience the benefits of solid gypsum sheets? Contact Saskatoon Drywallers today for expert advice and professional installation tailored to your needs. Let us help you transform your space with superior drywall solutions!
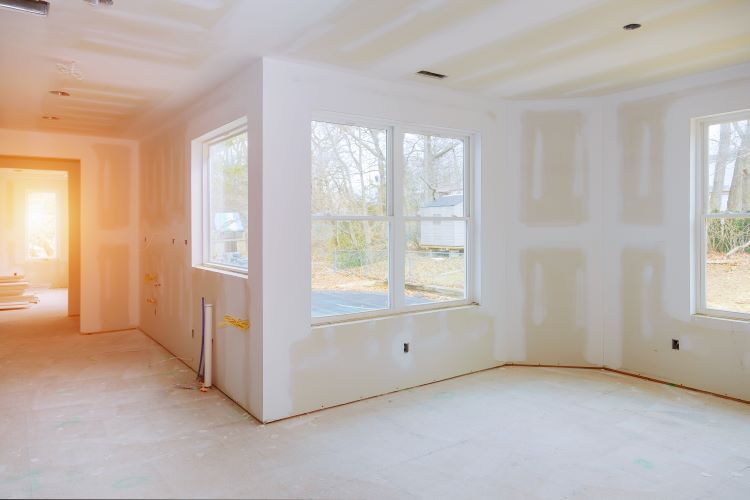
When considering the comfort and health of your home, indoor air quality (IAQ) plays a critical role. While many people focus on ventilation systems, furniture, and cleaning products, drywall can significantly influence the air you breathe. At Saskatoon Drywallers , we understand the importance of using high-quality materials and proper installation techniques to ensure your drywall contributes positively to your home's environment. How Drywall Affects Indoor Air Quality 1. VOC Emissions Drywall itself is primarily composed of gypsum, a natural and safe mineral. However, the compounds used in joint compounds, adhesives, and finishes can emit volatile organic compounds (VOCs). These emissions may impact indoor air quality, especially in poorly ventilated spaces. Solutions: Choose low-VOC or zero-VOC drywall products and finishes. Opt for eco-friendly, water-based paints and primers. 2. Mold and Mildew Growth In regions like Saskatoon, where fluctuating humidity levels are common, moisture can infiltrate walls and lead to mold and mildew growth on drywall. Mold releases spores into the air, potentially causing respiratory issues and allergies. Prevention Tips: Install moisture-resistant or mold-resistant drywall in high-humidity areas like bathrooms and basements. Address leaks and condensation promptly to prevent moisture buildup. 3. Dust from Installation and Repairs Drywall installation and repairs often generate dust from cutting and sanding. This fine dust can linger in the air, irritating the respiratory system and exacerbating conditions like asthma. Mitigation Strategies: Use dust containment systems during installation. Clean up thoroughly with HEPA-filter vacuums to minimize airborne particles. 4. Air Purification Properties of Specialized Drywall Innovative drywall products, like air-purifying drywall, are now available. These options are designed to absorb and neutralize airborne toxins like formaldehyde, contributing to cleaner air indoors. Benefits of Air-Purifying Drywall: Reduces harmful chemical compounds in the air. Enhances overall indoor air quality, especially in newly constructed or renovated homes. The Role of Professional Installation Professional drywall installation ensures that the materials are properly handled and applied, reducing risks to IAQ. At Saskatoon Drywallers, we follow strict protocols to: Minimize dust and debris during installation. Seal joints and edges to prevent air leaks. Recommend and use high-quality, low-emission products. Long-Term Maintenance for Better IAQ Maintaining your drywall is just as important as its initial installation. To ensure your indoor air quality remains high: Inspect for Damage Regularly: Address cracks, holes, or water stains promptly. Control Humidity Levels: Use dehumidifiers and proper ventilation to prevent moisture issues. Repaint with Low-VOC Paints: When refreshing your walls, opt for eco-friendly options. Why Choose Saskatoon Drywallers? At Saskatoon Drywallers, we prioritize your health and comfort. Our team is committed to delivering top-notch drywall services while ensuring the materials and techniques we use promote a healthy living environment. Whether you need new drywall installation or repairs , you can trust us to enhance both the functionality and air quality of your space. Conclusion Drywall plays a larger role in indoor air quality than many homeowners realize. By choosing the right materials, ensuring proper installation, and maintaining your walls, you can create a safer, healthier home environment for your family. Ready to improve your home's walls and air quality? Contact Saskatoon Drywallers today to learn more about our expert services and how we can help create the ideal indoor environment for you.
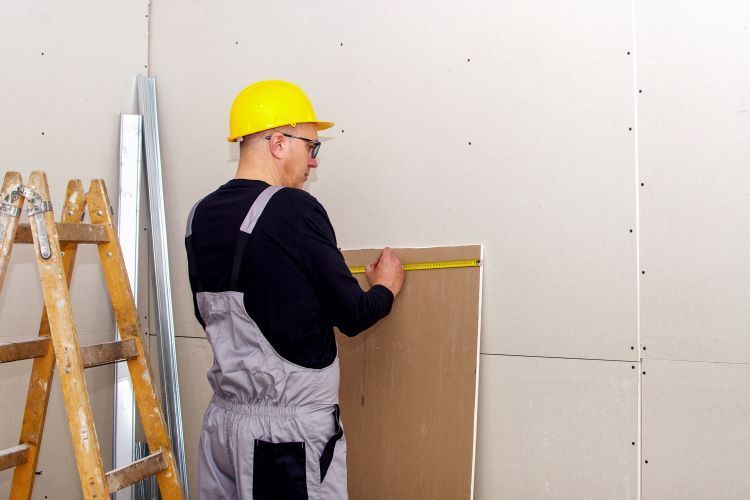
When it comes to giving your home or office a fresh new look, drywall installation is one of the most essential steps in the renovation process. However, the success of your drywall project largely depends on proper preparation. At Saskatoon Drywallers , we know that getting your walls ready for drywall installation is crucial to achieving a smooth, professional finish. In this article, we’ll walk you through everything you need to know about preparing your walls for drywall installation, ensuring a flawless result. Why Wall Preparation is Important Before you can hang drywall, it's essential to ensure that your walls are properly prepared. Proper preparation helps: Ensure a Smooth Finish: Prepping the walls prevents imperfections that could affect the final appearance of your drywall. Increase Durability: Addressing underlying issues, such as moisture or structural weaknesses, helps prolong the lifespan of your drywall. Save Time and Money: Proper preparation reduces the likelihood of costly repairs down the line. Step-by-Step Guide to Preparing Your Walls for Drywall Installation 1. Clear the Workspace Before starting any drywall project, it's essential to create a clean, clutter-free workspace. Remove furniture, decorations, and any other items that may obstruct your work area. This will not only make the job easier but also ensure your belongings are protected from dust and debris. Tip: Cover floors with drop cloths or plastic sheeting to prevent damage from dust or falling debris. 2. Inspect the Walls for Damage Take the time to thoroughly inspect your walls for any signs of damage. Look for: Cracks: Small cracks may indicate settling, while larger cracks could suggest structural issues. Moisture Damage: Check for water stains, mold, or mildew, which could indicate leaks or high humidity. Pests: Ensure there are no signs of termite or pest damage. Tip: Address any damage before installing drywall to prevent further issues. 3. Repair Any Wall Damage If you find any damage during your inspection, make the necessary repairs before proceeding. Here's how to address common issues: Cracks and Holes: Fill small cracks and holes with joint compound, then sand smooth. For larger holes, use a patch kit or cut out the damaged section and replace it with new drywall. Moisture Issues: Fix any leaks and use a dehumidifier to dry out damp areas. Consider using mold-resistant drywall in areas prone to moisture. Pest Damage: Consult a pest control professional if needed, and repair any damaged wood or insulation. 4. Check Wall Framing and Insulation Before hanging drywall, it's crucial to ensure that your wall framing is solid and secure. Use a level to check that your studs are plumb (vertically straight) and evenly spaced, typically 16 inches apart on center. If necessary, adjust the framing to create a smooth, even surface for drywall installation. Insulation: If your walls aren't already insulated, this is the perfect time to add insulation to improve energy efficiency and soundproofing. Tip: Consider using foam or fiberglass batt insulation to enhance your home’s thermal performance. 5. Install Electrical and Plumbing If you're planning to add new electrical outlets, light switches, or plumbing fixtures, now is the time to do it. Installing these elements before hanging drywall will save you the hassle of cutting into newly installed walls later. Tip: Work with a licensed electrician or plumber to ensure that your installations meet local building codes. 6. Install Vapor Barrier (If Needed) In colder climates like Saskatoon, installing a vapor barrier is essential to prevent moisture from seeping into your walls and causing damage. A vapor barrier helps protect your insulation and framing from moisture build-up, which can lead to mold and mildew. How to Install: Use plastic sheeting or specialized vapor barrier products, securing them with staples or adhesive. Make sure to overlap seams by at least 6 inches and seal them with tape. 7. Add Backing for Heavy Fixtures If you plan to hang heavy items like shelves, cabinets, or a wall-mounted TV, install additional backing between the studs. This will provide extra support and prevent your drywall from cracking under the weight. Tip: Use 2x6 boards as backing and attach them securely to the studs where needed. 8. Clean the Wall Surface Before installing drywall, make sure your walls are clean and free of dust, debris, or any loose materials. Use a vacuum or a broom to clean the surface thoroughly. Tip: Wipe down the studs with a damp cloth to ensure that dust doesn't interfere with the adhesive properties of the drywall. 9. Mark Stud Locations Once your walls are prepped, use a pencil or chalk line to mark the location of the studs. This will make it easier to secure the drywall sheets during installation. Tip: Use a stud finder for accurate marking, and mark each stud along the floor and ceiling for easy reference. 10. Gather Your Drywall Supplies Before you begin hanging drywall, make sure you have all the necessary tools and materials on hand: Drywall sheets Drywall screws or nails Drywall saw or utility knife Tape measure T-square or straight edge Joint compound and drywall tape Sanding block or drywall sander Why Choose Saskatoon Drywallers for Your Drywall Installation? At Saskatoon Drywallers, we specialize in professional drywall installation and repair services for residential and commercial properties. Here's why you should trust us with your next project: Expertise: Our experienced team knows the ins and outs of drywall installation, ensuring a flawless finish every time. Quality Materials: We use only the best drywall materials to ensure long-lasting durability and performance. Customer Satisfaction: We’re committed to delivering top-notch results and exceptional customer service on every job. Final Thoughts Preparing your walls for drywall installation is a critical step that can make or break the success of your project. By following these preparation tips, you can ensure a smooth, professional finish that will last for years to come. Whether you’re renovating your home, finishing your basement, or upgrading a commercial space, proper wall preparation is the key to achieving the best results. Ready to start your drywall project? Contact Saskatoon Drywallers today for expert advice, top-quality materials, and professional installation services in Saskatoon and the surrounding areas. Let’s turn your vision into reality! Transform your space with the best drywall services in Saskatoon. Contact us today for a free consultation and estimate!
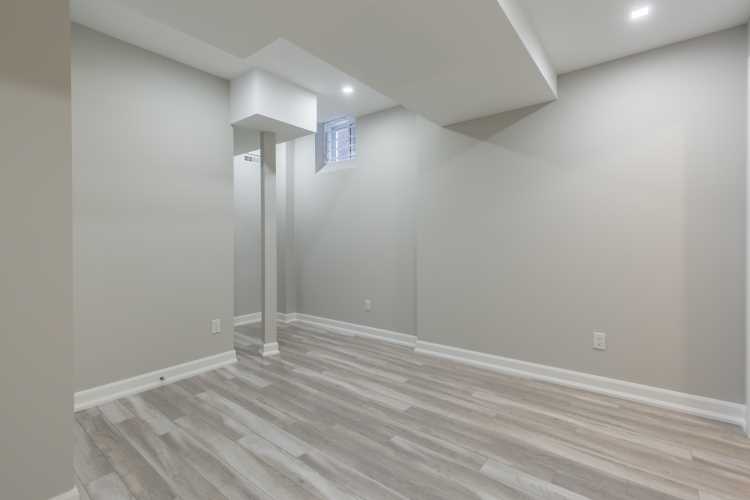
Drywalling a basement is an essential part of many home renovations. Whether you're converting your basement into a living area, a home office, or a playroom, drywalling helps transform the space into a functional and comfortable part of your home. However, one common question homeowners often ask is, "How long does it take to drywall a basement?" At Saskatoon Drywallers , we’ve worked on countless basement drywall projects across Saskatoon, and we understand the factors that can influence the timeline for completing a basement drywall job. While every project is different, several key factors affect the amount of time needed. In this blog post, we’ll break down the typical timeline for drywalling a basement and what you can expect during each phase. Factors That Influence Drywalling Time Before we get into the specifics of how long it will take to drywall your basement, it's important to understand that the timeline can vary based on several factors, including: Basement Size The overall size of your basement plays a big role in how long the drywall installation will take. A larger space with more walls and ceilings to cover will naturally take longer than a smaller basement. Basement Layout The complexity of the layout also matters. If your basement has many corners, alcoves, or awkward spaces, it will take longer to measure, cut, and fit the drywall properly. Experience of the Drywall Team An experienced drywall team will work much faster than an inexperienced one, thanks to their knowledge of techniques, tools, and how to handle unexpected challenges efficiently. Drywall Type and Finishing Requirements If you're opting for custom drywall designs, such as textured finishes or higher-end materials, the project may take longer. Similarly, if your basement needs additional finishing work like taping, mudding, and sanding, the project will require more time. Pre-Existing Conditions If your basement requires preparation work, such as insulation, electrical work, or framing adjustments, this will add time to the overall process. These steps are often necessary before drywall can be installed. Weather and Drying Conditions Drying times for drywall mud (joint compound) can vary based on the temperature and humidity levels in your basement. Drywall compound typically needs at least 24 hours to dry between coats, so weather conditions may influence how long the overall process takes. General Timeline for Drywalling a Basement Here’s a rough breakdown of what you can expect during a typical basement drywall installation and how long each step might take: 1. Preparation and Framing (1-2 Days) Before drywall installation can begin, the basement must be properly framed and prepared. This includes ensuring that electrical wiring, plumbing, and insulation are in place. If the framing and other preparatory work are already done, this phase will be shorter. If not, it could take additional time. 2. Drywall Installation (2-4 Days) The actual installation of drywall is one of the most time-consuming steps. This involves: Measuring and cutting drywall panels to fit the walls and ceiling of the basement. Hanging the drywall by attaching it to the studs with drywall screws. For a standard basement, hanging the drywall can take around 2-4 days, depending on the size of the space and the number of rooms. Smaller or simpler layouts will take less time, while more complicated designs or larger basements may take longer. 3. Taping and Mudding (2-3 Days) Once the drywall is up, the next step is to tape and mud the seams. This is where the drywall tape is applied to the seams and then covered with joint compound (mud) to create a smooth finish. This process can take around 2-3 days, with a drying time of 24 hours between coats of mud. In total, you’ll likely need to apply at least two to three coats of joint compound to ensure smooth, seamless seams. Each layer must dry completely before sanding and applying the next coat, which can add time to the project. 4. Sanding and Finishing (1-2 Days) Once the mud has dried, the next step is sanding and finishing the drywall. This ensures that any bumps, ridges, or imperfections are smoothed out and that the surface is ready for paint or other finishes. Sanding typically takes 1-2 days, depending on the amount of mud applied and the smoothness of the initial coats. This step is crucial for achieving a flawless finish, so don’t rush it. After sanding, if necessary, you may need a touch-up coat of mud, followed by another sanding session. 5. Priming and Painting (2-3 Days) Once the drywall finishing is complete, it's time to prime and paint the walls. Priming helps the paint adhere better and ensures a more even coat, while painting adds the final look and color to your basement. Priming and painting a basement typically takes an additional 2-3 days, depending on the number of coats needed. If you’re opting for a more intricate finish, such as a textured or specialty paint job, this may take longer. Total Timeline for Drywalling a Basement In total, the process of drywalling a basement typically takes 7-14 days. This timeline accounts for installation, mudding, sanding, and painting, and assumes that the space is already prepped and ready for drywall. If additional work, such as framing, insulation, or electrical work, is needed, it could add a few more days to the overall project. Tips for Speeding Up the Process While drywalling is inherently a time-consuming task, there are a few things you can do to help speed up the process: Prepare your space: Make sure the basement is cleared of any obstacles and that all necessary framing, insulation, and electrical work are completed before drywallers arrive. Choose a reliable team: Working with an experienced drywall company like Saskatoon Drywallers will ensure that the job gets done efficiently and to a high standard. Consider pre-finished drywall: Pre-finished or pre-textured drywall can reduce the time spent on finishing touches like painting and sanding. Conclusion Drywalling a basement is a multi-step process that takes time and attention to detail. For a typical basement, you can expect the entire process to take between 7 to 14 days, depending on factors like size, layout, and finishing requirements. Working with experienced professionals, like Saskatoon Drywallers , ensures the project will be completed efficiently and with top-notch results. If you’re ready to start your basement drywall project or want more information on how we can help, reach out to Saskatoon Drywallers today! We’ll guide you through every step of the drywall process to make sure your basement looks amazing.
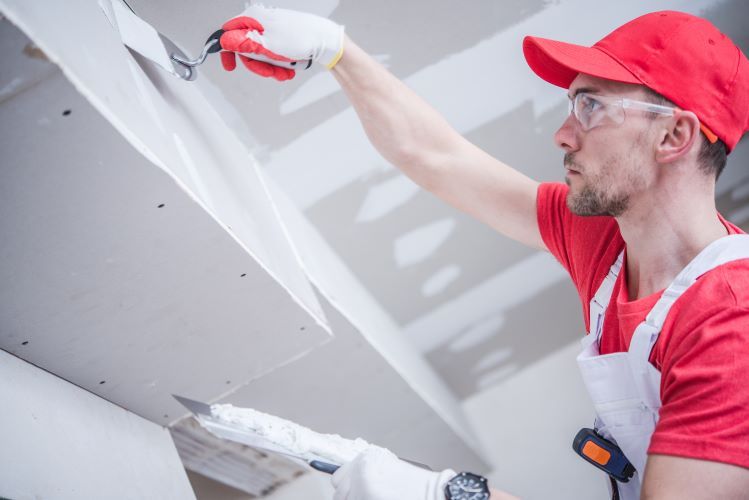
Drywall finishing is the art of transforming raw drywall sheets into smooth, polished walls ready for paint or other finishes. At Saskatoon Drywallers , we know how important a quality finish is to the overall look of your space. If you’re planning a drywall installation, here’s an in-depth look at the drywall finishing process and what you can expect for a flawless outcome. Understanding the Levels of Drywall Finishing Drywall finishing consists of several stages, each adding to the final appearance. Industry standards define five distinct levels of drywall finish, from Level 0 to Level 5. Choosing the right level depends on your aesthetic preferences and the final surface treatment. Level 0: No finishing is done. This is just bare drywall installed, with no tape, mud, or sanding. Level 1: Basic taping and mudding for joints and screws. Often used in unfinished spaces like garages or attics. Level 2: Adds a second coat of joint compound over tape, suitable for areas that will be covered or tiled. Level 3: A third coat of compound, smoothed out, intended for walls that will receive a textured finish. Level 4: For smooth walls with a light or flat paint finish. Sanded to an even, seamless surface. Level 5: Adds a thin layer of joint compound over the entire surface for a pristine finish, ideal for high-end walls under bright lighting or glossy paint. For most interior walls, Level 4 is a common standard, while Level 5 is popular in areas with high lighting or visible imperfections. Step-by-Step Drywall Finishing Process 1. Preparation Before any finishing work begins, proper preparation is crucial. At Saskatoon Drywallers, we ensure that drywall sheets are securely installed, with minimal gaps and firmly fastened screws. Small issues like rough edges or misalignments are corrected in this stage. Additionally, a clean workspace is essential, as dust or debris can interfere with the finishing process. 2. Taping the Seams Taping involves covering the seams between drywall sheets with joint tape, usually made of paper or fiberglass mesh. Paper tape is more common and is applied over a thin layer of joint compound. Fiberglass tape is typically used for extra strength and durability. Taping strengthens the joints and prevents cracks as the building settles over time. Pro Tip: Paper tape is less prone to stretching or bubbling when applied correctly, which makes it a popular choice for walls and ceilings. 3. First Coat of Joint Compound (Mudding) Once the tape is in place, the first layer of joint compound, also known as “mud,” is applied over the taped seams and screw indentations. The goal of this layer is to fill in gaps and create a smooth transition between drywall sheets. Drying Time: Joint compound usually needs at least 24 hours to dry, depending on room temperature and humidity levels. Faster-setting “hot mud” compounds are also available, which dry within hours and can be useful for time-sensitive projects. 4. Second Coat of Joint Compound After the first layer has dried, a second coat of mud is applied. This coat is slightly wider than the first, extending beyond the edges of the tape to ensure a smooth blend with the surrounding drywall. At Saskatoon Drywallers, we pay careful attention to smoothing this layer, as each coat builds toward a flawless surface. 5. Third Coat and Sanding A final coat of compound is applied, further smoothing any remaining unevenness. This coat provides a polished base and is especially important for Levels 4 and 5 finishes. After it dries, the surface is sanded carefully to remove any visible lines, bumps, or rough patches. Sanding Tip: Using fine-grit sandpaper (such as 220 grit) ensures that the finish is even without damaging the drywall surface. 6. Level 5 Skim Coat (Optional) For high-end finishes, an additional skim coat of joint compound is applied across the entire wall or ceiling surface. This final layer provides an exceptionally smooth finish that prevents any minor imperfections from showing through paint, particularly under direct lighting. After the skim coat, a final round of sanding ensures that the surface is flawless. 7. Priming the Surface Priming is a critical final step before painting. The primer seals the porous surface of the drywall and joint compound, creating a uniform base for paint application. It also enhances paint adhesion and ensures that the color appears consistent across the wall. Without a good primer, paint can appear uneven, especially in areas where joint compound is applied. Primer Selection: For high-moisture areas like bathrooms or basements, moisture-resistant or mold-inhibiting primers are ideal. For walls with a Level 5 finish, a high-build primer can further smooth the surface. Common Challenges and How Professionals Overcome Them Drywall finishing may look straightforward, but achieving a smooth and seamless look requires skill and experience. Here are some common challenges and how professionals at Saskatoon Drywallers handle them: Joint Compound Drying and Cracking: Inconsistent temperatures can cause joint compound to dry too quickly or unevenly, leading to cracks. We maintain a stable environment to prevent this and use compounds suitable for the specific space. Achieving Smooth Seams: Blending drywall sheets seamlessly requires precision. Our team uses the right tools, including wide drywall knives and sanders, to create a clean, level surface. Dust Control: Sanding drywall can create a lot of dust. Our professionals use dust barriers and vacuums to contain dust, keeping the work area clean and safe for residents. Why Choose Professional Drywall Finishing? While DIY drywall finishing might seem cost-effective, achieving a professional look takes experience and proper technique. At Saskatoon Drywallers, we ensure that your drywall installation is durable, crack-free, and ready for paint. With our trained team and high-quality materials, we deliver results that stand the test of time, enhancing the aesthetic and functional value of your space. Final Thoughts Whether you’re finishing new drywall or renovating an existing room, a quality drywall finish makes a significant difference in appearance. Understanding the process helps set realistic expectations and ensures a better result. From taping to sanding, every step plays a role in the final look and durability of your walls. Ready to transform your home with a smooth, polished drywall finish? Contact Saskatoon Drywallers to learn more about our drywall services or to schedule your next project. We’re here to provide top-notch drywall finishes that elevate your interior space!
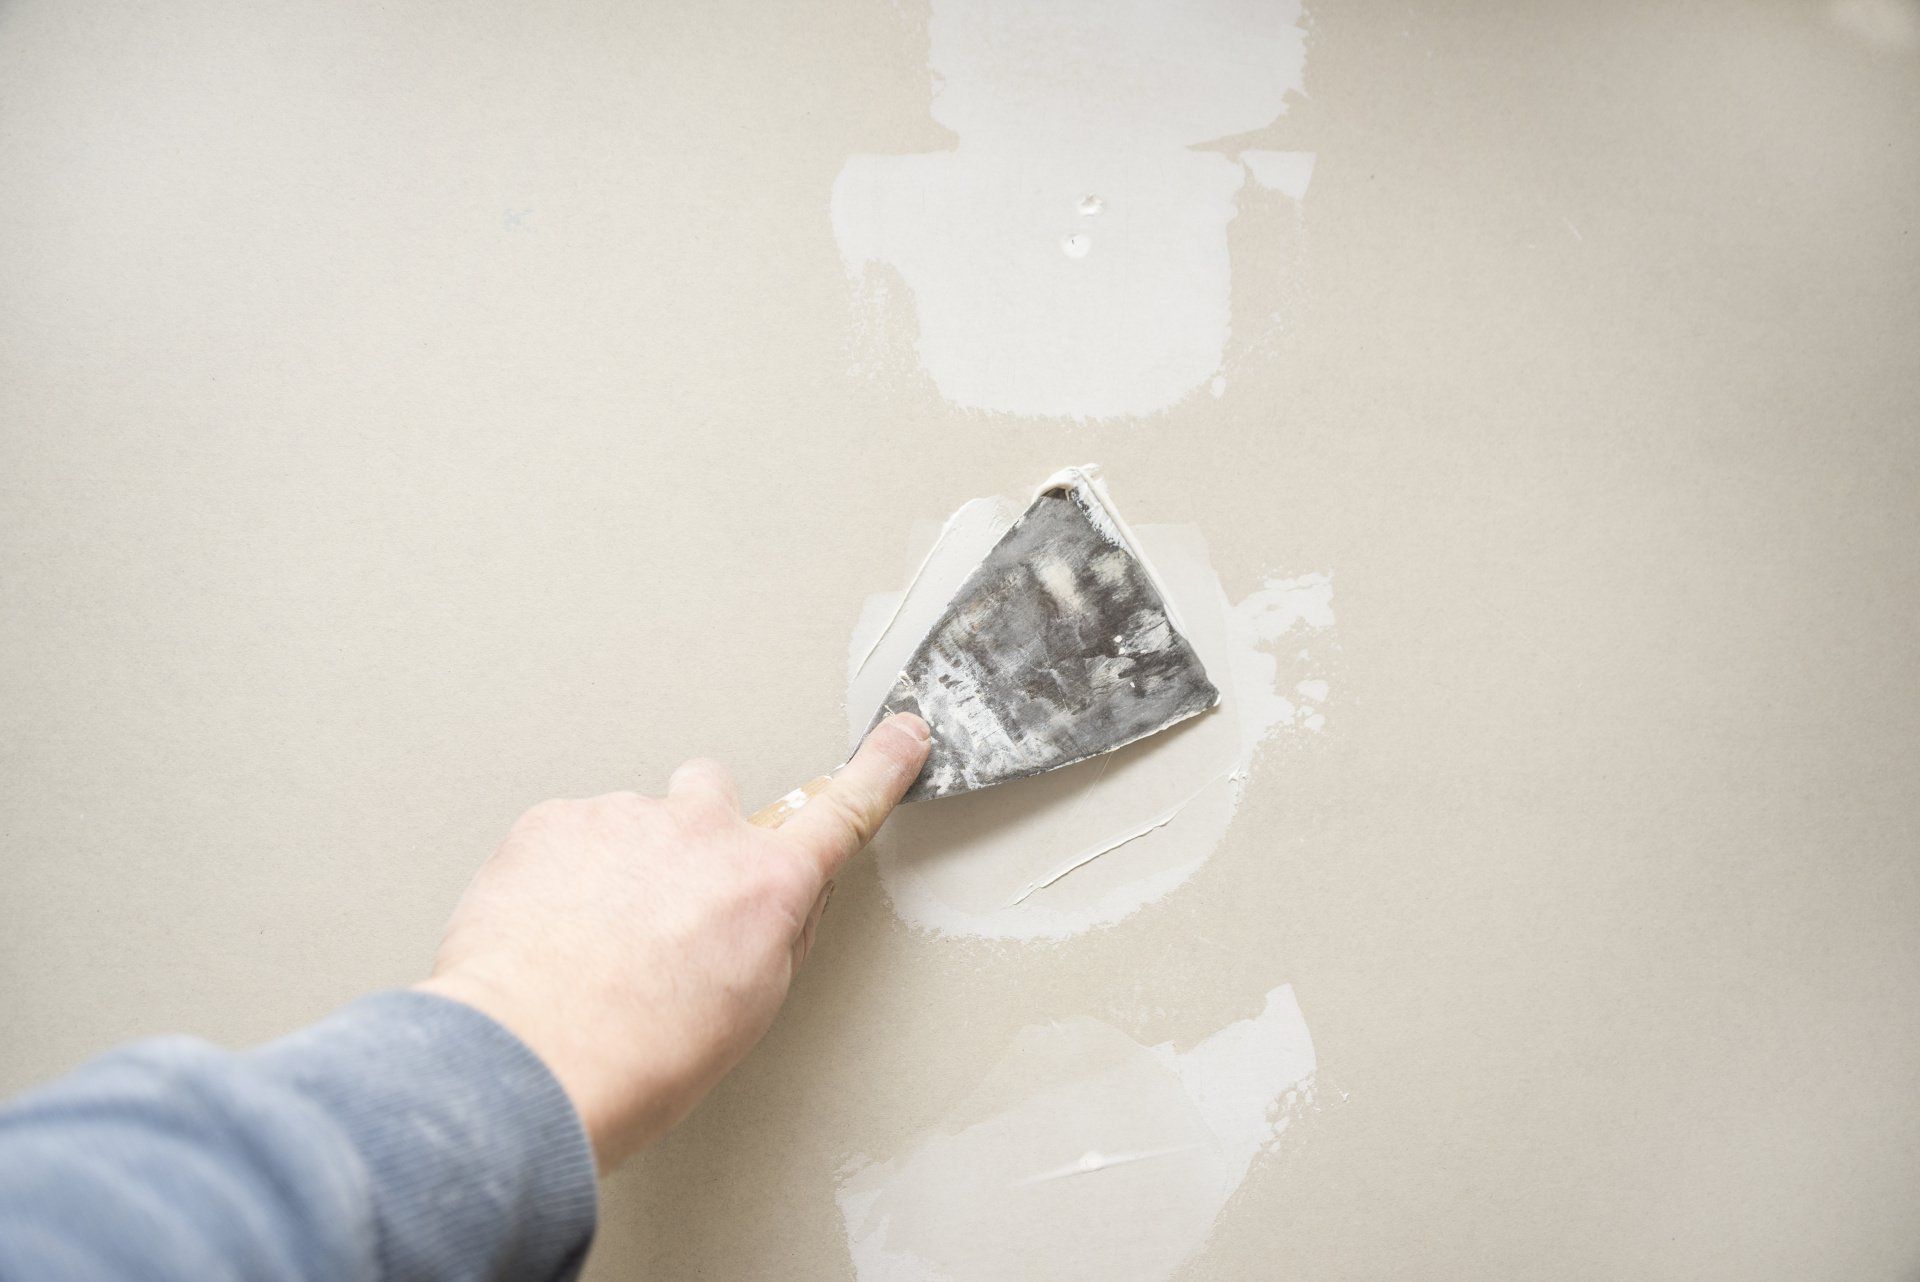
When it comes to maintaining a flawless look in any room, smooth and well-kept walls are essential. Over time, however, minor damage to drywall—like cracks, holes, and scuffs—is nearly inevitable. A well-prepared drywall repair kit can make all the difference in achieving a professional finish with minimal hassle. Below is a complete checklist of must-have supplies to make sure you’re fully prepared for seamless drywall repair . This guide is brought to you by Saskatoon Drywallers , your local experts in drywall solutions! 1. Drywall Patching Compound (Spackle or Joint Compound) The foundation of any drywall repair is a reliable patching compound. You have options like quick-drying spackle for smaller holes or joint compound (also called “mud”) for more extensive repairs. Spackle dries quickly and is perfect for nail holes, while joint compound works well for smoothing out larger damaged areas. Pro Tip: Opt for a low-dust or lightweight compound to reduce cleanup and create a smoother surface. 2. Drywall Repair Patches Repair patches are a lifesaver for holes larger than half an inch. These mesh or metal adhesive patches are easy to apply, providing stability to the damaged area before applying joint compound. Types of Patches: Mesh: For medium-sized holes and cracks. Metal-backed: For added durability on larger areas of damage. 3. Putty Knives and Taping Knives For a seamless finish, a variety of knives is essential: 2-3 inch Putty Knife: Perfect for small patches and applying spackle to nail holes. 6-12 inch Taping Knife: Ideal for spreading compound smoothly over larger areas or wider patches. Pro Tip: Stainless steel knives are durable, rust-resistant, and give a cleaner finish. 4. Sandpaper or Sanding Sponge Sanding is critical to achieving a smooth and even finish on your repair. Sandpaper ranging from 120- to 220-grit is ideal for this. Sanding sponges are another excellent option, as they’re easy to handle and can be used for precise smoothing. Medium grit: For initial sanding to smooth out large patches. Fine grit: For finishing and blending the repair into the surrounding drywall. 5. Primer and Paint Priming your repair before painting ensures even color application and durability. Use a primer compatible with drywall, such as a stain-blocking primer, to help cover up any differences between the patched and original drywall. Once primed, match the paint color for a seamless look. Pro Tip: Even if the color match isn’t exact, it’s often possible to blend edges using a feathering technique with a sponge or roller. 6. Drywall Tape For cracks and larger repairs, drywall tape reinforces the joint compound. There are three main types to consider: Paper Tape: Best for general repairs and easy to embed into the compound. Mesh Tape: Self-adhesive and ideal for larger or stress-prone areas. Ultra-thin Fiberglass Tape: Adds strength without adding bulk, great for smooth finishes. 7. Utility Knife and Scissors A sharp utility knife is essential for cutting out damaged sections of drywall, trimming tape, or creating a clean edge on patches. Scissors can also be useful for cutting tape or mesh. Pro Tip: Replace the utility knife blade regularly to avoid tearing the drywall. 8. Dust Mask and Safety Gear Drywall repair can produce a significant amount of dust. Wearing a dust mask, safety goggles, and gloves is essential to protect yourself from inhaling dust or getting debris in your eyes. 9. Drop Cloth and Painter’s Tape Preparation is key to preventing a messy workspace. Place a drop cloth under your repair area to catch dust and debris, and use painter’s tape to mask off any adjoining walls or trim to avoid accidental smudges. 10. Sponge and Clean Cloths After sanding, a damp sponge can help wipe away dust, making it easier for paint or primer to adhere. Use clean cloths to wipe off any residue for a smooth, dust-free surface. Tips for a Seamless Finish Following these tips will help you achieve a professional-grade repair that blends seamlessly with the rest of your wall: Layering Technique: Apply joint compound in thin layers, allowing each layer to dry before applying the next. This approach reduces shrinkage and cracking. Feathering the Edges: When applying compound around the edges of the repair, use light pressure to feather it into the surrounding wall. This helps the patch blend into the existing drywall. Final Sanding and Clean-Up: Once the compound is dry, lightly sand with a fine-grit sandpaper until smooth. Be careful not to sand through the patch. Get Professional Help from Saskatoon Drywallers While many small drywall repairs are manageable as DIY projects, larger repairs and refinishing may benefit from the expertise of professional drywallers. Saskatoon Drywallers are here to ensure flawless results, whether you’re tackling small touch-ups or extensive renovations. Contact us today for a consultation and see how we can make your walls look good as new!
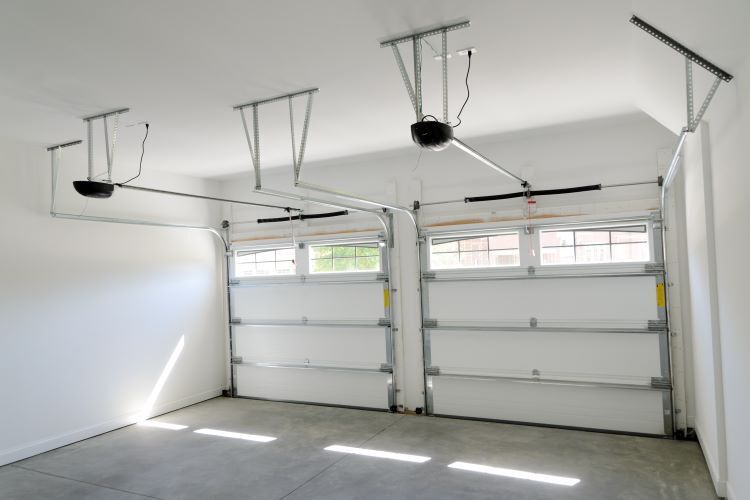
Finishing the drywall in your garage can transform a cold, unfinished space into a functional and polished area. Whether you're looking to create a workshop, improve insulation, or simply enhance the appearance of your garage, properly finishing drywall is key. In this guide, Saskatoon Drywallers provides a comprehensive step-by-step process to help you achieve professional results when finishing drywall in your garage . Step 1: Gather Your Materials and Tools Before starting, ensure you have all the necessary materials and tools. Here’s a list of items you’ll need: Drywall sheets (appropriate thickness, typically ½ inch for walls and ⅝ inch for ceilings) Drywall screws Tape measure Utility knife Drywall saw (for cutting around outlets and fixtures) T-square or straight edge Drywall joint tape Joint compound (mud) Sanding block or drywall sander Drywall primer and paint Safety gear (goggles, gloves, and dust mask) Having everything ready will make the process smoother and more efficient. Step 2: Install Drywall Sheets Once you've gathered your tools, it's time to hang the drywall. Here's how to do it: Measure and Cut Drywall Start by measuring the garage walls and ceiling. Cut the drywall sheets to the appropriate size using a utility knife or drywall saw. Be sure to leave space for electrical outlets, light switches, and any other fixtures by cutting out those sections carefully. Install Ceiling Drywall First It’s important to begin by attaching the drywall sheets to the ceiling. Use drywall screws to secure the panels to the ceiling joists, spacing the screws about 12 to 16 inches apart. Be sure the drywall sheets are flush and snugly fitted to prevent sagging. You may need a second person or a drywall lift to help hold the sheets in place. Hang the Wall Drywall Next, move on to the walls. Start at the top of the wall and work your way down. Like the ceiling, fasten the drywall sheets to the wall studs using drywall screws, keeping the screws evenly spaced. Trim around any obstacles, such as windows, doors, or outlets, ensuring a neat finish. Step 3: Tape and Mud the Seams With the drywall securely installed, it’s time to tape and mud the seams for a smooth finish. Apply Joint Tape Start by applying drywall joint tape to all the seams where the drywall sheets meet. This will reinforce the joints and prevent cracking. Place the tape over the seams and press it firmly into the joint compound. First Coat of Joint Compound Using a putty knife, apply the first coat of joint compound (commonly called mud) over the taped seams. Spread it evenly across the joints, ensuring the tape is fully covered. Use smooth, even strokes to avoid lumps and bumps. Also, apply mud to cover any screw holes or imperfections in the drywall. Let It Dry and Sand Once the first coat is applied, allow it to dry completely. This may take 24 hours, depending on the temperature and humidity in the garage. After drying, use a sanding block or drywall sander to smooth out any rough spots or high areas in the mud. Step 4: Apply Additional Coats of Joint Compound For a professional-looking finish, you’ll need to apply two more coats of joint compound. Second Coat Apply a second, thinner coat of joint compound over the seams, extending the compound beyond the edges of the first coat. This will help to feather out the joint and create a smooth transition between the drywall sheets. Allow this coat to dry completely, and then sand it lightly. Third Coat Repeat the process with a third coat, again feathering out the edges even further. The goal is to create a seamless surface between the drywall sheets. Once this final coat is dry, sand it one last time to achieve a smooth finish. Step 5: Prime and Paint the Drywall Now that your drywall is smooth and free of imperfections, it’s time to finish it with primer and paint. Prime the Drywall Before painting, apply a drywall primer to seal the surface and prepare it for the final coat of paint. Primer ensures that the paint adheres properly and provides a consistent finish. Allow the primer to dry thoroughly before proceeding. Paint the Walls and Ceiling Once primed, you can paint the walls and ceiling in your desired color. For garages, it's recommended to use a durable, easy-to-clean paint, such as semi-gloss or satin finish, to withstand wear and tear. Apply at least two coats of paint for an even and professional-looking finish. Step 6: Inspect and Touch Up After painting, inspect the entire garage for any imperfections or areas that may need touch-up. Check for spots where the drywall tape might be visible, areas where the joint compound is uneven, or spots where the paint coverage is thin. If necessary, sand any rough spots, apply more joint compound where needed, and touch up the paint for a flawless finish. Step 7: Clean Up and Enjoy Your Finished Garage Once everything is dry and finished, clean up any debris, dust, and tools from the workspace. Congratulations, your garage is now beautifully finished with drywall, offering a more polished, insulated, and functional space! Conclusion Finishing drywall in a garage is a rewarding project that can dramatically improve the look and utility of the space. By following these steps, you can create a smooth, professional finish that enhances your garage's overall appearance and functionality. For more complicated drywall installations or if you prefer expert help, Saskatoon Drywallers is here to assist with all your drywall needs. Our team provides high-quality drywall services to ensure your garage looks and performs its best for years to come.
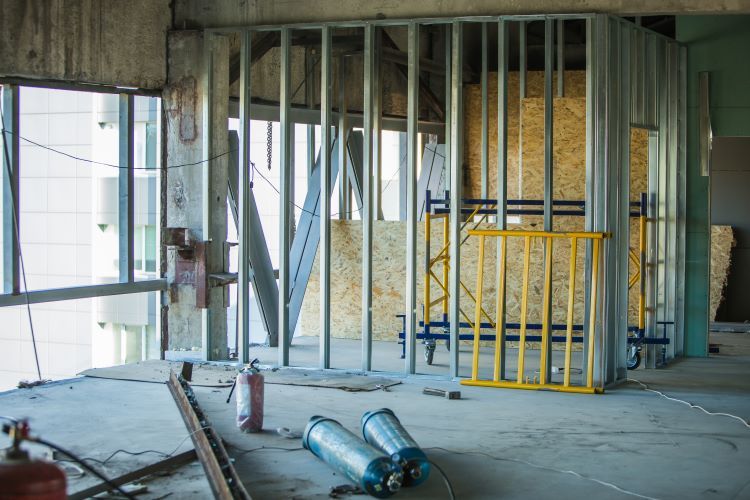
When it comes to drywall installation , framing is a crucial step that sets the foundation for a sturdy and long-lasting finish. Whether you’re working on a new construction project or renovating an existing space, one of the key decisions you'll face is choosing between metal and wood framing. Each option has its pros and cons, and understanding these can help you make an informed choice that meets your project's specific needs. At Saskatoon Drywallers , we’re here to guide you through the differences between metal and wood drywall framing . Metal Framing: Strength and Durability Advantages of Metal Framing Resistance to Moisture and Pests: Metal studs are not susceptible to mold, rot, or insect damage, making them an ideal choice for areas prone to moisture, such as basements and bathrooms. Fire Resistance: Steel is inherently more fire-resistant than wood, which can be a critical factor in certain building codes and safety regulations. Consistency and Precision: Metal studs are manufactured to precise specifications, leading to a more uniform and straight framework. This precision can help in achieving smoother drywall finishes. Less Warping: Unlike wood, metal does not warp, twist, or shrink over time, ensuring that your drywall remains flush and secure. Disadvantages of Metal Framing Cost: Metal framing can be more expensive upfront than wood framing due to material costs and the need for specialized tools for cutting and installation. Installation Difficulty: Metal studs are often lighter but can be more challenging to handle, especially for inexperienced DIYers. They may also require special fasteners and tools, such as a metal screw gun. Thermal Conductivity: Metal conducts heat and cold more efficiently than wood, which can lead to thermal bridging. This can reduce the energy efficiency of your walls if not properly insulated. Wood Framing: Traditional and Versatile Advantages of Wood Framing Cost-Effective: Wood framing is generally more affordable than metal framing, making it a popular choice for residential projects and smaller budgets. Ease of Installation: Wood studs are easier to cut and work with, making them a more straightforward option for DIY projects or for those less familiar with construction. Natural Insulation: Wood provides some level of thermal insulation, which can contribute to better energy efficiency in your home. Availability: Wood is widely available and comes in various types, allowing you to choose materials that fit your budget and aesthetic preferences. Disadvantages of Wood Framing Vulnerability to Pests and Moisture: Wood framing can be susceptible to termites, rot, and mold, especially in damp environments. Proper treatment and maintenance are crucial to prevent these issues. Fire Risk: Wood is a combustible material, which can pose a higher fire risk compared to metal framing. This factor may need to be considered, particularly in commercial applications. Potential for Warping: Wood can warp or twist over time, especially in areas with fluctuating temperatures and humidity levels. This can lead to issues with drywall alignment and finishes. Which Option Is Right for You? The choice between metal and wood drywall framing ultimately depends on your specific project requirements and conditions. Here are some factors to consider: Project Type: For residential projects or small renovations, wood framing may be the most practical and cost-effective choice. However, for commercial buildings or areas with high moisture, metal framing could provide better long-term durability. Budget: If cost is a significant factor, wood framing is often the more affordable option. However, consider the potential long-term costs associated with maintenance and repairs for wood framing. Environment: If you're in a region with high humidity or risk of pest infestations, metal framing might be the better choice. Conversely, if you value natural materials and insulation properties, wood may be more appealing. Aesthetic Preferences: Consider how the framing material may affect the overall look of your project. Wood can provide a warm, traditional feel, while metal can lend a modern, industrial aesthetic. Conclusion Both metal and wood drywall framing have their unique benefits and drawbacks, and the best choice depends on your specific project needs. At Saskatoon Drywallers , we specialize in both metal and wood framing, offering expert advice and services tailored to your requirements. Whether you’re constructing a new home, renovating your space, or simply need assistance with drywall installation, we’re here to help. Contact us today to discuss your project and discover how we can assist you in making the right framing choice for your drywall needs!
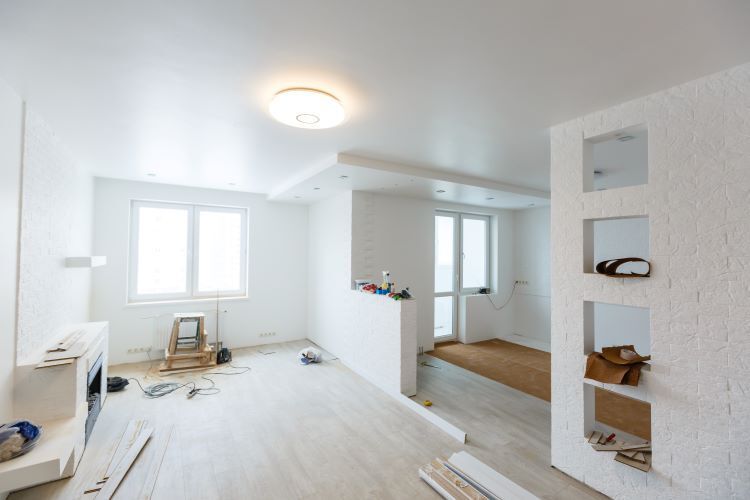
Drywall is a versatile and durable material used in most homes and businesses, but like any surface, it needs proper care and maintenance to keep it looking its best. Over time, wear and tear, minor damage, and environmental factors can impact the condition of your walls. With a few simple maintenance steps, you can keep your drywall in great shape for years to come. At Saskatoon Drywallers, we understand how important it is to maintain the beauty and functionality of your drywall, and we’re here to offer expert tips to help you keep your walls in perfect condition. 1. Regular Cleaning Dust, dirt, and grime can build up on drywall over time, especially in high-traffic areas like hallways, living rooms, and kitchens. Regular cleaning is essential to keep your walls looking fresh and prevent long-term discoloration. How to Clean Drywall: Dust regularly using a soft cloth or a microfiber duster to remove any loose dirt. For light stains or smudges, use a damp sponge with mild soap and water. Be sure to wring out excess water to avoid soaking the drywall. For stubborn stains, such as grease or pencil marks, try a gentle cleaning solution made from water and a small amount of white vinegar. Avoid using abrasive cleaners, scrubbing brushes, or too much water, as these can damage the drywall’s surface. Regular cleaning helps prevent dirt from accumulating and makes your walls look clean and well-maintained. 2. Repair Small Holes and Dents Promptly Small dents, nail holes, or minor cracks are common occurrences in drywall. These minor imperfections may seem insignificant, but they can become larger issues if left untreated. How to Repair Minor Damage: Small holes from nails or picture hangers can easily be filled with spackle or lightweight joint compound. Once dry, sand the area lightly and repaint. Dents and dings can also be smoothed out with joint compound. Use a putty knife to apply the compound, let it dry, and then sand the surface for a seamless finish. For hairline cracks, use joint compound or a crack repair kit to fill in the gaps, ensuring the wall remains structurally sound. By addressing minor damage quickly, you prevent the problem from worsening and ensure that your walls stay in top condition. 3. Monitor for Moisture and Humidity Drywall is sensitive to moisture, and excess humidity or water exposure can lead to serious problems such as mold growth, bubbling, and warping. Keeping your home’s humidity levels in check is essential for drywall longevity. Prevent Moisture Damage: Inspect for leaks regularly around windows, doors, plumbing, and ceilings, especially after heavy rainfall or if you notice any signs of water stains. Use dehumidifiers in rooms prone to high humidity, such as basements, bathrooms, and kitchens, to reduce moisture in the air. If you have a small leak or water damage, act quickly to dry the affected area and address the source of the water. If your drywall has already suffered from moisture damage, Saskatoon Drywallers can help with repairs and ensure that the issue doesn’t spread. 4. Prevent Structural Damage Drywall can become damaged if it is exposed to excessive force or impact. While accidents happen, there are a few ways to prevent structural damage to your walls. Tips for Preventing Damage: Install doorstops behind doors to prevent the door handle from making contact with the wall and causing dents. Avoid hanging heavy objects directly on drywall without the proper anchors or studs for support. Use drywall anchors or find wall studs for added strength. Teach children and pets to be mindful of the walls to prevent accidental damage from play or activity. Taking these simple precautions can help reduce the risk of cracks, dents, or holes in your drywall, preserving its condition over time. 5. Repaint Regularly Over time, paint can fade, chip, or become damaged, which affects the overall appearance of your drywall. Repainting your walls every few years helps to maintain a fresh and clean look, while also providing an extra layer of protection. Steps for Repainting Drywall: Start by cleaning the walls to remove any dust, dirt, or grease. Repair any holes or dents and sand the surface for a smooth finish. Apply a primer to ensure the new paint adheres properly, especially if you’re changing to a different color or if the drywall has any previous stains. Use high-quality paint that is appropriate for your room’s use, such as semi-gloss for kitchens or bathrooms and matte finishes for bedrooms or living rooms. Repainting your walls not only improves the aesthetic appeal of your home but also extends the life of your drywall by providing additional protection from everyday wear and tear. 6. Schedule Regular Inspections and Professional Maintenance While DIY repairs and maintenance can keep your drywall in great shape, it’s always a good idea to have a professional inspect your walls from time to time. A professional drywall contractor, like Saskatoon Drywallers, can identify potential issues before they become major problems, provide expert repairs, and ensure that your drywall remains structurally sound. Benefits of Professional Inspections: Early detection of hidden issues, such as mold or water damage. Expert repairs for larger damage, such as cracks or holes caused by settling or structural movement. Ensuring that all repairs are done with the highest quality materials and craftsmanship. Conclusion Maintaining your drywall is essential to keeping your home looking its best and ensuring its structural integrity. By following these drywall maintenance tips—regular cleaning, prompt repairs, managing moisture, preventing damage, repainting, and scheduling professional inspections—you can extend the life of your drywall and keep it in excellent condition for years to come. At Saskatoon Drywallers, we’re here to assist with any drywall maintenance or repair needs you may have. Whether you’re dealing with minor imperfections or major repairs, our team of experts can help restore your walls to their original beauty. Contact us today to schedule an inspection or learn more about our services!
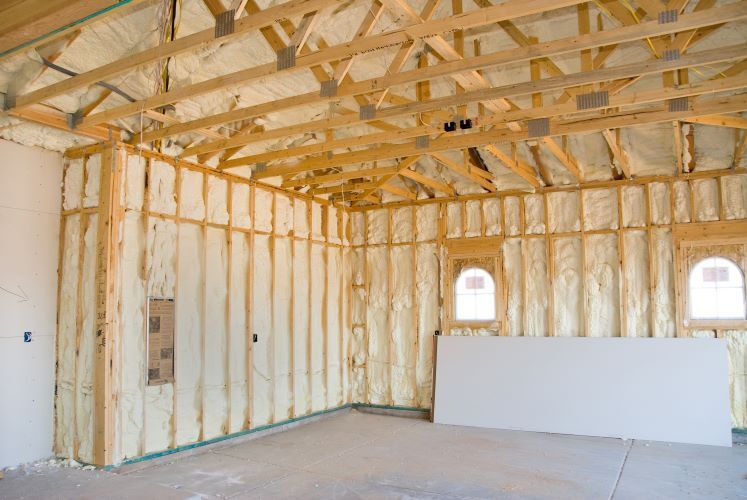
When it comes to creating a comfortable and energy-efficient home, drywall and insulation are a dynamic duo that work together to provide essential benefits. While drywall serves as the smooth, polished finish to your interior walls, insulation plays a crucial role in regulating temperature and reducing energy costs. Together, they form an integral part of your home’s structure and comfort. In this article, we’ll explore how drywall and insulation work hand in hand, how they impact your home’s energy efficiency, and why proper installation is essential for long-term benefits. 1. The Role of Insulation: Keeping Your Home Comfortable Insulation is the material that is installed inside walls, ceilings, and floors to slow the movement of heat and cold. In a city like Saskatoon, where temperatures can fluctuate drastically throughout the year, insulation is particularly important. Proper insulation helps keep your home warm in the winter and cool in the summer, creating a comfortable living environment year-round. Without adequate insulation, heat can escape through your walls and ceilings in the winter, while unwanted heat can seep in during the summer. This leads to higher energy bills as your heating and cooling systems work harder to maintain a consistent indoor temperature. Insulating your walls ensures that your home remains energy-efficient, ultimately saving you money. 2. Drywall: The Finishing Touch While insulation works behind the scenes, drywall provides the smooth, finished surface that you see inside your home. Drywall is installed over insulation and acts as a barrier between the insulation and your living space. It not only enhances the aesthetic appeal of your walls and ceilings but also adds structural integrity to your home. Drywall’s primary function is to create a clean and even surface, but it also offers additional benefits, such as fire resistance and soundproofing. When paired with insulation, drywall becomes an essential component of your home’s energy efficiency and comfort. 3. How Drywall and Insulation Work Together The combination of drywall and insulation creates an effective thermal barrier for your home. Here’s how they complement each other: Thermal Insulation: Insulation slows the transfer of heat, while drywall acts as a protective barrier, keeping the insulation in place. Together, they prevent heat from escaping in the winter and keep your home cooler in the summer. Soundproofing: I nsulation also helps reduce noise transmission between rooms, and drywall adds another layer of soundproofing. This combination is especially important in homes with multiple levels or shared walls, as it helps create a quieter living space. Fire Resistance: Certain types of drywall, such as fire-rated "Type X" drywall, provide added protection in case of a fire. When installed with insulation, this combination can slow the spread of flames, giving you valuable time to evacuate safely. Moisture Control: In areas of your home that are prone to moisture, such as basements or bathrooms, moisture-resistant drywall and insulation work together to prevent mold and mildew growth. This is particularly important in a climate like Saskatoon’s, where humidity levels can vary throughout the year. 4. Energy Efficiency: A Key Benefit One of the biggest advantages of combining drywall and insulation is the energy efficiency it brings to your home. Well-insulated walls, paired with properly installed drywall, help maintain a stable indoor temperature by minimizing heat transfer. This reduces the strain on your heating and cooling systems, which can significantly lower your energy bills. For homeowners in Saskatoon, where cold winters and hot summers are the norm, energy efficiency is a top priority. By investing in quality insulation and professional drywall installation, you can ensure that your home is better equipped to handle the changing seasons while keeping your energy costs under control. 5. Proper Installation Matters The effectiveness of drywall and insulation depends on proper installation. Even the best materials won’t perform as they should if they’re installed incorrectly. That’s why it’s crucial to hire experienced professionals, like the team at Saskatoon Drywallers, to ensure that your insulation and drywall are installed properly. Poor installation can lead to gaps in insulation, uneven drywall surfaces, and other issues that can compromise your home’s energy efficiency and overall comfort. A professional drywall and insulation installation not only ensures optimal performance but also increases the durability of your walls and ceilings, reducing the need for costly repairs down the road. 6. Choosing the Right Insulation and Drywall Different parts of your home may require different types of insulation and drywall to meet specific needs. For example: Walls: Standard drywall combined with fiberglass or spray foam insulation is commonly used for exterior walls to provide thermal protection and soundproofing. Basements: Moisture-resistant drywall and rigid foam insulation are ideal for basements, where the risk of moisture infiltration is higher. Ceilings: For ceilings, particularly in multi-level homes, soundproof drywall and blown-in insulation help reduce noise transmission between floors. At Saskatoon Drywallers, we can help you choose the right materials for each area of your home to maximize comfort and efficiency. 7. Enhancing Home Value Homes that are well-insulated and feature professionally installed drywall tend to have higher resale values. Potential buyers are more likely to invest in a property that offers energy efficiency, durability, and a modern, finished look. By upgrading your home’s insulation and drywall, you’re not only enhancing your living space but also adding long-term value to your property. Conclusion Drywall and insulation work together to create a comfortable, energy-efficient, and safe home. While insulation regulates temperature and reduces energy costs, drywall provides a smooth, finished surface that enhances the appearance and durability of your walls. Together, they form a powerful combination that can significantly improve your home’s overall performance. At Saskatoon Drywallers , we specialize in professional drywall and insulation services that are tailored to meet the unique needs of your home. Whether you’re building a new home or upgrading an existing one, our team is here to ensure that your walls and ceilings are expertly installed for maximum comfort and efficiency. Contact us today to learn more about how drywall and insulation can work together to benefit your home. Let us help you create a living space that’s not only beautiful but also energy-efficient and long-lasting.