Blog Layout

All You Need to Know About Drywall Installation

June 6, 2024

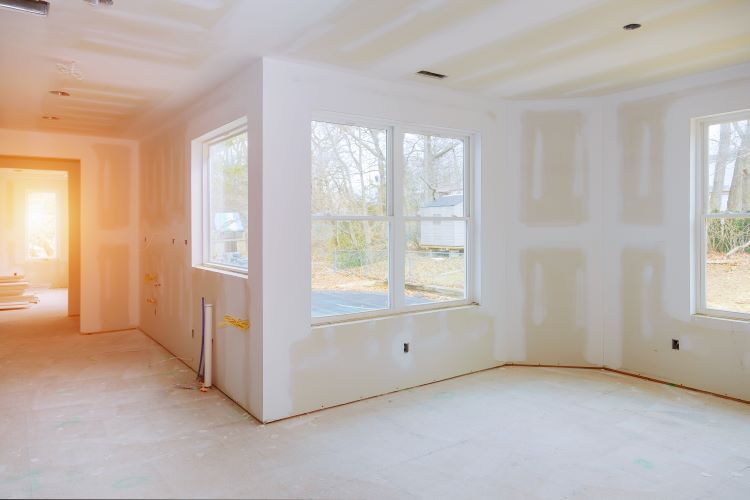
Drywall installation is a crucial part of any construction or renovation project, providing a smooth, durable surface for walls and ceilings. Whether you're building a new home or remodeling an existing space, understanding the drywall installation process can help ensure professional, long-lasting results. At Saskatoon Drywallers, we pride ourselves on delivering top-quality drywall services to the Saskatoon community. In this blog, we’ll walk you through the drywall sheet installation process and share expert tips to achieve flawless results.


Step-by-Step Drywall Sheet Installation Process

1. Planning and Preparation

Before you begin, it's essential to plan and prepare your workspace.

  • Measure the Area: Measure the dimensions of your walls and ceilings to determine the number of drywall sheets you'll need.
  • Gather Materials and Tools: Ensure you have all necessary materials and tools, including drywall sheets, screws or nails, a utility knife, a drywall saw, a T-square, a tape measure, a drywall lift (for ceilings), and joint compound.
  • Prepare the Workspace: Clear the area of any obstacles and cover the floors to protect them from dust and debris.


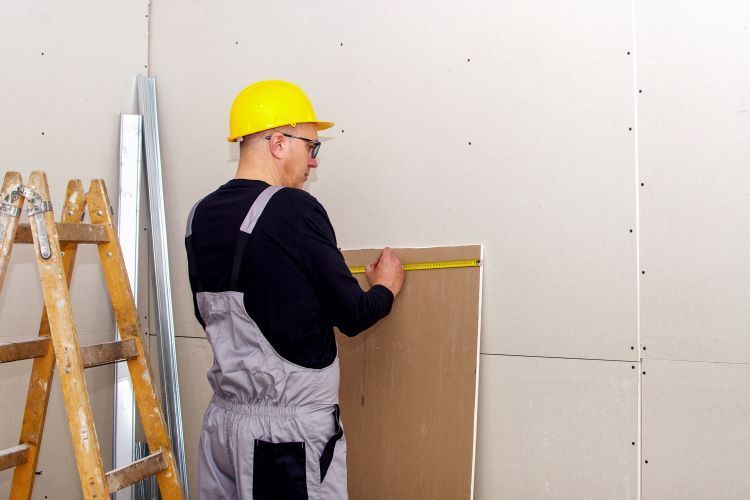
2. Cutting the Drywall Sheets

Cutting the drywall sheets to the correct size is the first step in the installation process.

  • Measure and Mark: Measure the wall height and mark the drywall sheet accordingly.
  • Score and Snap: Using a T-square and utility knife, score the drywall along the marked line. Then, snap the sheet along the scored line for a clean break.
  • Cut Openings: Use a drywall saw to cut openings for electrical outlets, light switches, and other fixtures.


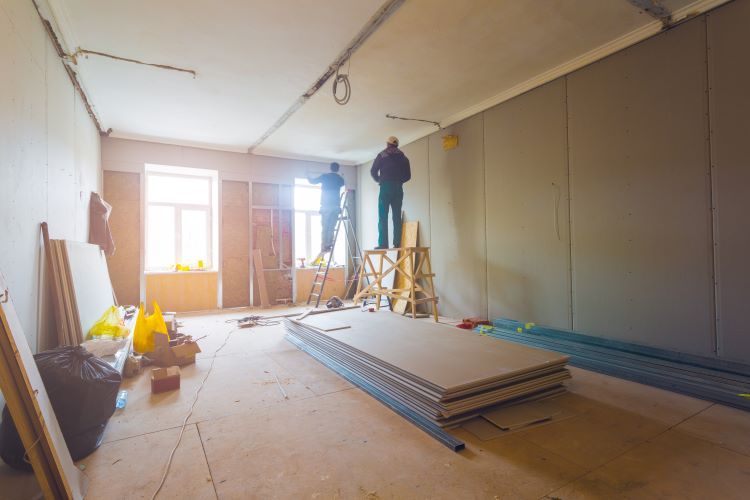
3. Installing the Drywall Sheets

Once your sheets are cut to size, it's time to install them.

  • Position the Sheets: Start with the top sheets when installing drywall on walls. For ceilings, use a drywall lift to hold the sheet in place.
  • Secure the Sheets: Use drywall screws or nails to secure the sheets to the studs. Place screws or nails every 12-16 inches along the studs, ensuring they are slightly recessed without breaking the paper surface.
  • Stagger the Joints: Stagger the vertical joints of the drywall sheets to increase stability and reduce the risk of cracking.


4. Taping and Mudding

After the drywall sheets are securely in place, the next step is to tape and mud the joints.

  • Apply Joint Tape: Apply joint tape along the seams between the drywall sheets.
  • First Coat of Joint Compound: Using a drywall knife, apply a thin coat of joint compound over the tape. Feather the edges to create a smooth transition.
  • Second and Third Coats: Once the first coat is dry, apply two more coats of joint compound, allowing each coat to dry before applying the next. Sand between coats to ensure a smooth finish.


5. Sanding and Finishing

The final steps involve sanding and finishing the drywall to prepare it for painting or wallpaper.

  • Sand the Surface: Sand the dried joint compound to create a smooth, even surface. Be sure to wear a mask to protect yourself from dust.
  • Prime the Drywall: Apply a coat of primer to the drywall to seal the surface and create an even base for paint or wallpaper.


Expert Tips for Professional Drywall Installation

1. Use the Right Tools

Investing in quality tools can make a significant difference in the ease and outcome of your drywall installation. Tools such as a drywall lift, a T-square, and a good-quality utility knife are essential for achieving professional results.

2. Properly Space Screws and Nails

Ensure that screws or nails are properly spaced and slightly recessed. Overdriving fasteners can break the drywall paper and compromise the integrity of the installation.

3. Feather Your Joint Compound

When applying joint compound, feather the edges to blend it smoothly into the drywall. This will minimize visible seams and create a seamless finish.

4. Take Your Time with Sanding

Sanding is a crucial step for achieving a smooth surface. Take your time and use fine-grit sandpaper to avoid creating scratches or uneven areas.

5. Clean the Workspace

Keeping your workspace clean and free of dust and debris will help ensure a smoother finish and reduce the risk of imperfections in your drywall.


Why Choose Saskatoon Drywallers?

At Saskatoon Drywallers, we bring years of experience and a commitment to excellence to every project. Here's why we are the ideal choice for your drywall needs:

  • Expertise: Our team of professionals has extensive experience in drywall installation, repair, and finishing.
  • Quality Materials: We use only the highest quality materials to ensure durability and a superior finish.
  • Customer Satisfaction: We prioritize customer satisfaction and work closely with our clients to deliver results that exceed expectations.
  • Local Knowledge: As a local company, we understand the specific needs and challenges of homes and businesses in Saskatoon.


Contact Saskatoon Drywallers today for a consultation and let us help you achieve flawless, professional drywall results for your next project.


At Saskatoon Drywallers, we are dedicated to providing top-notch drywall services to the Saskatoon community. Visit our website or call us to learn more about our services and to schedule a consultation.

You might also like

December 2, 2024
When it comes to building or renovating a home, choosing the right drywall is a critical decision. For homeowners and contractors in Saskatoon, solid gypsum sheets stand out as the ultimate choice for superior drywall. Renowned for their durability, versatility, and aesthetic appeal, solid gypsum sheets provide a reliable solution for creating smooth, long-lasting walls and ceilings. Here’s why they’re a cut above the rest. What Are Solid Gypsum Sheets? Solid gypsum sheets, commonly referred to as drywall or plasterboard, are panels made primarily from gypsum – a natural mineral known for its fire resistance and strength. These sheets are sandwiched between layers of durable paper, creating a lightweight yet robust material perfect for interior wall and ceiling construction. Benefits of Solid Gypsum Sheets 1. Exceptional Durability Solid gypsum sheets are engineered to withstand the wear and tear of daily life. Whether it’s in high-traffic areas or busy family homes, these sheets resist dents, scratches, and impacts better than many other options. 2. Fire Resistance One of gypsum’s most remarkable properties is its fire resistance. Solid gypsum sheets act as a barrier, slowing the spread of fire and providing critical time for occupants to evacuate. This makes them an excellent choice for enhancing home safety in Saskatoon’s residential and commercial properties. 3. Smooth Finish for Aesthetic Appeal When installed and finished correctly, gypsum sheets create an impeccably smooth surface, perfect for painting or wallpapering. This ensures your walls and ceilings look polished and professional. 4. Sound Insulation Solid gypsum sheets are an effective choice for soundproofing. Whether you want to block noise between rooms or reduce echoes in a shared space, gypsum sheets can help create a quieter, more comfortable environment. 5. Mold and Moisture Resistance Specially treated gypsum sheets are available with mold and moisture-resistant properties. These are ideal for humid areas such as bathrooms, basements, and kitchens, helping to prevent costly repairs caused by water damage. Applications of Solid Gypsum Sheets Residential Projects From living rooms to bedrooms, solid gypsum sheets are perfect for creating smooth, durable walls and ceilings in homes across Saskatoon. Commercial Spaces Gypsum sheets are widely used in offices, retail stores, and restaurants for their clean finish and ability to meet fire safety standards. Renovation Projects Updating your walls? Solid gypsum sheets make it easy to modernize your space while maintaining structural integrity. Why Choose Saskatoon Drywallers for Your Gypsum Needs? At Saskatoon Drywallers , we understand that quality materials and expert installation are essential for superior results. Here’s why clients trust us for their drywall projects: Premium Materials : We source only the highest-quality solid gypsum sheets to ensure lasting performance. Professional Installation : Our skilled team ensures precise installation, delivering smooth, flawless walls every time. Customized Solutions : We tailor our services to meet the specific needs of your project, from moisture-resistant sheets to specialized fire-rated panels. Local Expertise : With years of experience serving Saskatoon, we understand the unique demands of local homes and businesses. Tips for Maintaining Solid Gypsum Drywall Inspect Regularly : Check for cracks, dents, or moisture damage and address issues promptly to maintain integrity. Repaint Periodically : Refreshing the paint can help protect the surface and keep your walls looking their best. Control Humidity : Use dehumidifiers in moisture-prone areas to prevent mold growth. Conclusion Solid gypsum sheets offer an unbeatable combination of durability, safety, and style, making them the ultimate choice for drywall in Saskatoon. Whether you’re building a new home, renovating a space, or upgrading your business, these versatile panels deliver exceptional results. Ready to experience the benefits of solid gypsum sheets? Contact Saskatoon Drywallers today for expert advice and professional installation tailored to your needs. Let us help you transform your space with superior drywall solutions!
November 27, 2024
When considering the comfort and health of your home, indoor air quality (IAQ) plays a critical role. While many people focus on ventilation systems, furniture, and cleaning products, drywall can significantly influence the air you breathe. At Saskatoon Drywallers , we understand the importance of using high-quality materials and proper installation techniques to ensure your drywall contributes positively to your home's environment. How Drywall Affects Indoor Air Quality 1. VOC Emissions Drywall itself is primarily composed of gypsum, a natural and safe mineral. However, the compounds used in joint compounds, adhesives, and finishes can emit volatile organic compounds (VOCs). These emissions may impact indoor air quality, especially in poorly ventilated spaces. Solutions: Choose low-VOC or zero-VOC drywall products and finishes. Opt for eco-friendly, water-based paints and primers. 2. Mold and Mildew Growth In regions like Saskatoon, where fluctuating humidity levels are common, moisture can infiltrate walls and lead to mold and mildew growth on drywall. Mold releases spores into the air, potentially causing respiratory issues and allergies. Prevention Tips: Install moisture-resistant or mold-resistant drywall in high-humidity areas like bathrooms and basements. Address leaks and condensation promptly to prevent moisture buildup. 3. Dust from Installation and Repairs Drywall installation and repairs often generate dust from cutting and sanding. This fine dust can linger in the air, irritating the respiratory system and exacerbating conditions like asthma. Mitigation Strategies: Use dust containment systems during installation. Clean up thoroughly with HEPA-filter vacuums to minimize airborne particles. 4. Air Purification Properties of Specialized Drywall Innovative drywall products, like air-purifying drywall, are now available. These options are designed to absorb and neutralize airborne toxins like formaldehyde, contributing to cleaner air indoors. Benefits of Air-Purifying Drywall: Reduces harmful chemical compounds in the air. Enhances overall indoor air quality, especially in newly constructed or renovated homes. The Role of Professional Installation Professional drywall installation ensures that the materials are properly handled and applied, reducing risks to IAQ. At Saskatoon Drywallers, we follow strict protocols to: Minimize dust and debris during installation. Seal joints and edges to prevent air leaks. Recommend and use high-quality, low-emission products. Long-Term Maintenance for Better IAQ Maintaining your drywall is just as important as its initial installation. To ensure your indoor air quality remains high: Inspect for Damage Regularly: Address cracks, holes, or water stains promptly. Control Humidity Levels: Use dehumidifiers and proper ventilation to prevent moisture issues. Repaint with Low-VOC Paints: When refreshing your walls, opt for eco-friendly options. Why Choose Saskatoon Drywallers? At Saskatoon Drywallers, we prioritize your health and comfort. Our team is committed to delivering top-notch drywall services while ensuring the materials and techniques we use promote a healthy living environment. Whether you need new drywall installation or repairs , you can trust us to enhance both the functionality and air quality of your space. Conclusion Drywall plays a larger role in indoor air quality than many homeowners realize. By choosing the right materials, ensuring proper installation, and maintaining your walls, you can create a safer, healthier home environment for your family. Ready to improve your home's walls and air quality? Contact Saskatoon Drywallers today to learn more about our expert services and how we can help create the ideal indoor environment for you.
November 18, 2024
When it comes to giving your home or office a fresh new look, drywall installation is one of the most essential steps in the renovation process. However, the success of your drywall project largely depends on proper preparation. At Saskatoon Drywallers , we know that getting your walls ready for drywall installation is crucial to achieving a smooth, professional finish. In this article, we’ll walk you through everything you need to know about preparing your walls for drywall installation, ensuring a flawless result. Why Wall Preparation is Important Before you can hang drywall, it's essential to ensure that your walls are properly prepared. Proper preparation helps: Ensure a Smooth Finish: Prepping the walls prevents imperfections that could affect the final appearance of your drywall. Increase Durability: Addressing underlying issues, such as moisture or structural weaknesses, helps prolong the lifespan of your drywall. Save Time and Money: Proper preparation reduces the likelihood of costly repairs down the line. Step-by-Step Guide to Preparing Your Walls for Drywall Installation 1. Clear the Workspace Before starting any drywall project, it's essential to create a clean, clutter-free workspace. Remove furniture, decorations, and any other items that may obstruct your work area. This will not only make the job easier but also ensure your belongings are protected from dust and debris. Tip: Cover floors with drop cloths or plastic sheeting to prevent damage from dust or falling debris. 2. Inspect the Walls for Damage Take the time to thoroughly inspect your walls for any signs of damage. Look for: Cracks: Small cracks may indicate settling, while larger cracks could suggest structural issues. Moisture Damage: Check for water stains, mold, or mildew, which could indicate leaks or high humidity. Pests: Ensure there are no signs of termite or pest damage. Tip: Address any damage before installing drywall to prevent further issues. 3. Repair Any Wall Damage If you find any damage during your inspection, make the necessary repairs before proceeding. Here's how to address common issues: Cracks and Holes: Fill small cracks and holes with joint compound, then sand smooth. For larger holes, use a patch kit or cut out the damaged section and replace it with new drywall. Moisture Issues: Fix any leaks and use a dehumidifier to dry out damp areas. Consider using mold-resistant drywall in areas prone to moisture. Pest Damage: Consult a pest control professional if needed, and repair any damaged wood or insulation. 4. Check Wall Framing and Insulation Before hanging drywall, it's crucial to ensure that your wall framing is solid and secure. Use a level to check that your studs are plumb (vertically straight) and evenly spaced, typically 16 inches apart on center. If necessary, adjust the framing to create a smooth, even surface for drywall installation. Insulation: If your walls aren't already insulated, this is the perfect time to add insulation to improve energy efficiency and soundproofing. Tip: Consider using foam or fiberglass batt insulation to enhance your home’s thermal performance. 5. Install Electrical and Plumbing If you're planning to add new electrical outlets, light switches, or plumbing fixtures, now is the time to do it. Installing these elements before hanging drywall will save you the hassle of cutting into newly installed walls later. Tip: Work with a licensed electrician or plumber to ensure that your installations meet local building codes. 6. Install Vapor Barrier (If Needed) In colder climates like Saskatoon, installing a vapor barrier is essential to prevent moisture from seeping into your walls and causing damage. A vapor barrier helps protect your insulation and framing from moisture build-up, which can lead to mold and mildew. How to Install: Use plastic sheeting or specialized vapor barrier products, securing them with staples or adhesive. Make sure to overlap seams by at least 6 inches and seal them with tape. 7. Add Backing for Heavy Fixtures If you plan to hang heavy items like shelves, cabinets, or a wall-mounted TV, install additional backing between the studs. This will provide extra support and prevent your drywall from cracking under the weight. Tip: Use 2x6 boards as backing and attach them securely to the studs where needed. 8. Clean the Wall Surface Before installing drywall, make sure your walls are clean and free of dust, debris, or any loose materials. Use a vacuum or a broom to clean the surface thoroughly. Tip: Wipe down the studs with a damp cloth to ensure that dust doesn't interfere with the adhesive properties of the drywall. 9. Mark Stud Locations Once your walls are prepped, use a pencil or chalk line to mark the location of the studs. This will make it easier to secure the drywall sheets during installation. Tip: Use a stud finder for accurate marking, and mark each stud along the floor and ceiling for easy reference. 10. Gather Your Drywall Supplies Before you begin hanging drywall, make sure you have all the necessary tools and materials on hand: Drywall sheets Drywall screws or nails Drywall saw or utility knife Tape measure T-square or straight edge Joint compound and drywall tape Sanding block or drywall sander Why Choose Saskatoon Drywallers for Your Drywall Installation? At Saskatoon Drywallers, we specialize in professional drywall installation and repair services for residential and commercial properties. Here's why you should trust us with your next project: Expertise: Our experienced team knows the ins and outs of drywall installation, ensuring a flawless finish every time. Quality Materials: We use only the best drywall materials to ensure long-lasting durability and performance. Customer Satisfaction: We’re committed to delivering top-notch results and exceptional customer service on every job. Final Thoughts Preparing your walls for drywall installation is a critical step that can make or break the success of your project. By following these preparation tips, you can ensure a smooth, professional finish that will last for years to come. Whether you’re renovating your home, finishing your basement, or upgrading a commercial space, proper wall preparation is the key to achieving the best results. Ready to start your drywall project? Contact Saskatoon Drywallers today for expert advice, top-quality materials, and professional installation services in Saskatoon and the surrounding areas. Let’s turn your vision into reality! Transform your space with the best drywall services in Saskatoon. Contact us today for a free consultation and estimate!
More Posts

Book a Service Today

Share by: